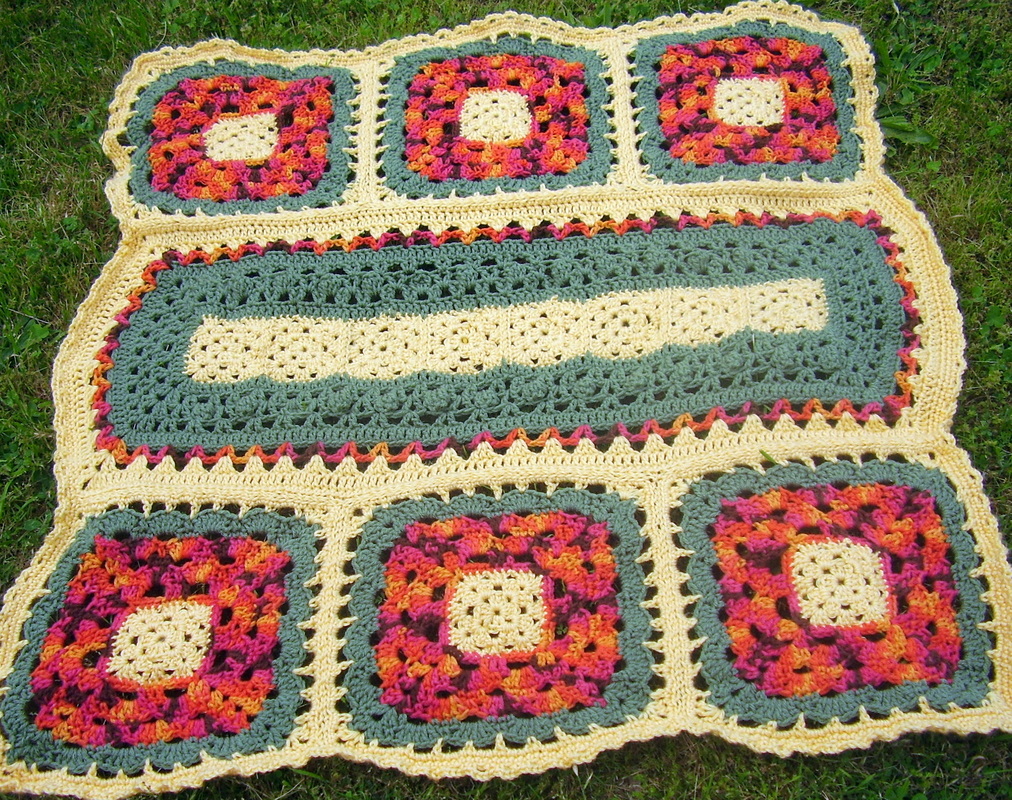
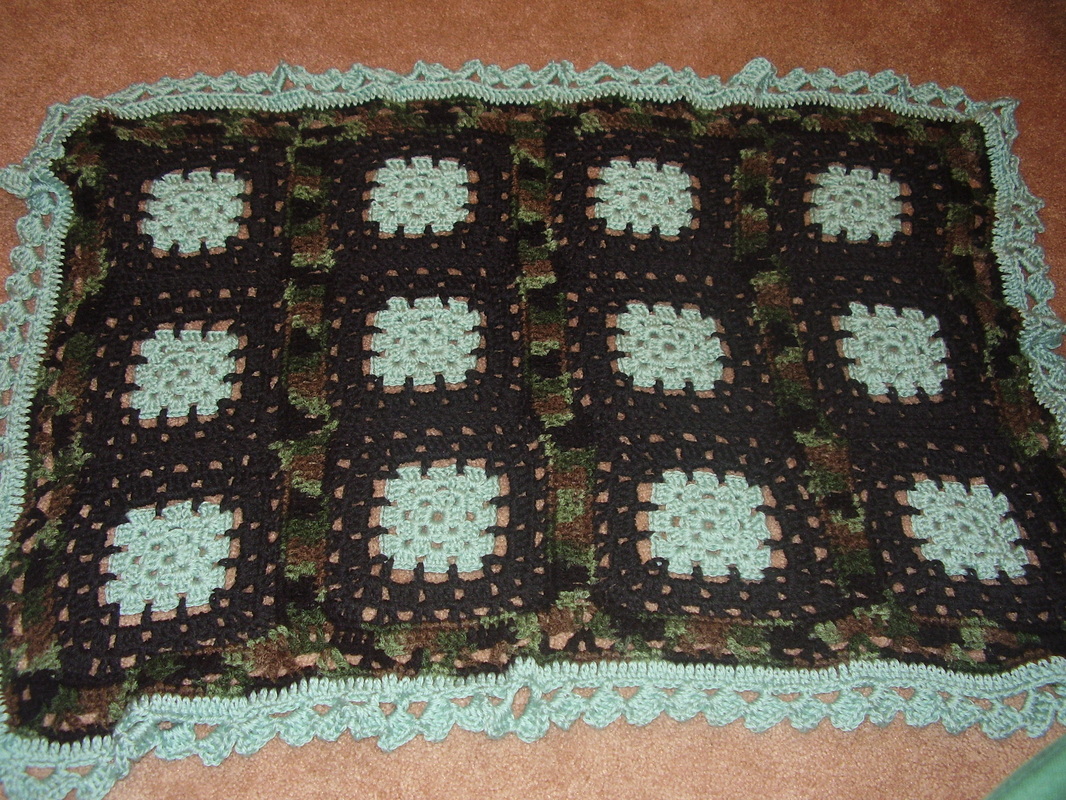
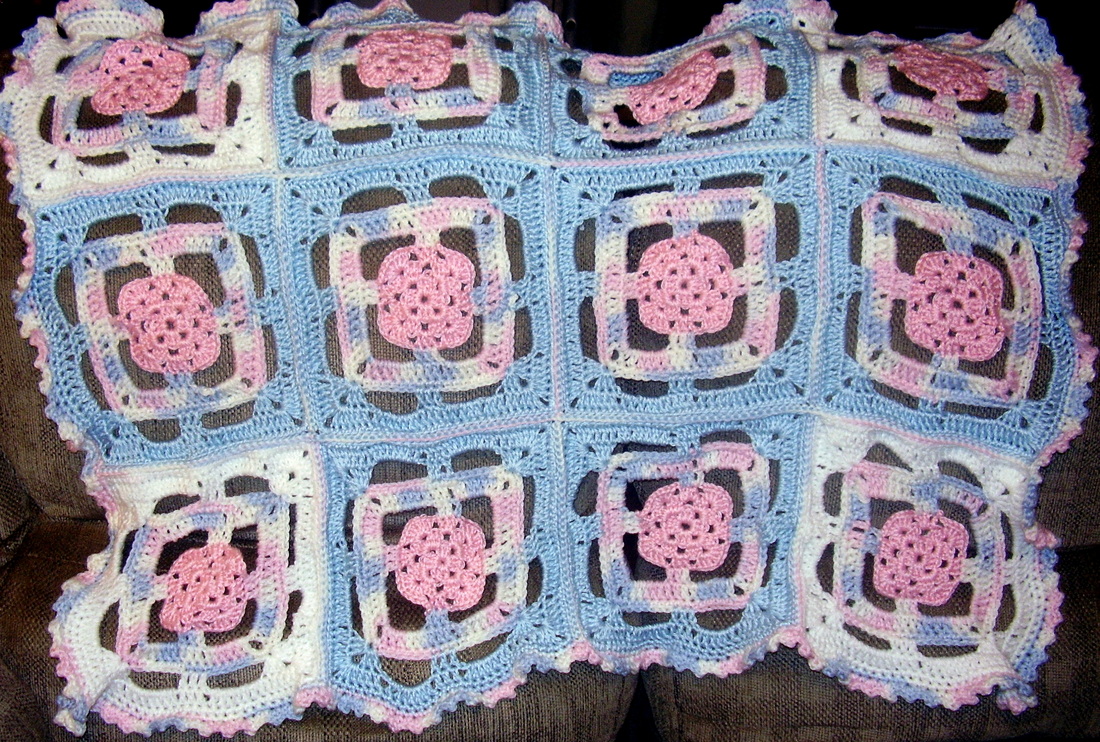
At long last, the post I promised with several easy afghan edgings. I apologize that I didn’t get this posted sooner!
When edging an afghan you can choose to continue in the same color or add a new color. If you are continuing in the same color you can start the edging at your last stitch from the previous row or, if you are close to the corner, you can choose to slip stitch to the corner and start there. If you are doing an edging that requires a certain count, I will typically start in the corner. If you are adding a new color for the edge, add in the corner.
In addition, unless the edging has a specific way to do the corner then some suggestions are (depending on the afghan style pick what works best): Three ss or dc in the center corner stitch or one – three sc or dc with a chain 2 and two or three sc/dc in the corner stitch. Follow your pattern or follow your imagination, whatever works best for you. I also recommend that you do a foundation row of sc or dc before you start your edge for a cleaner finish.
These first three edges or trims are designed to be close to the afghan because when I first started making afghans I mainly crocheted premie comfort afghans. Due to the small size of these premature babies, it is recommended not to have holes or dangling parts.
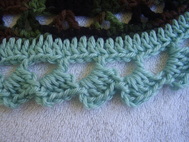
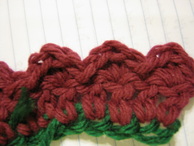 Two simple yet elegant edges for afghans are variations on the shell stitch:
Small shell: ss in first ch, (sc, dc, sc) in next, ss in next ch, repeat around.
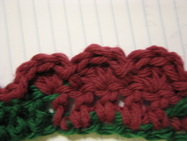 Large shell: ss in first 2 ch, 3dc in next ch, ss in next 2 ch, 3dc in next ch, repeat around.
Another variation is to make the shell with (dc, triple, dc) (not pictured)
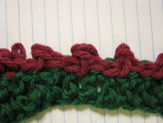 Another easy but attractive edging, especially for masculine blankets, is: ss first ch, in the next ch (ss, dc, ss), ss in the next ch and repeat around (if you have a hard time completing the dc you can just chain 2 or 3 – see which you like best!). This makes a fun bumpy edge that is simple yet pleasing to the eye and touch.
 For a more advanced and unusual trim try the block edge – I loved it when I first saw this pattern and it took a few tries to master it so don’t be discouraged if you don’t catch on right away! Have at least one if not two rows of sc before you do this edge.
Chain 4, *skip next 3 sts, 1 trc in next st, 3 ch, 4 dc around stem of trc just worked, rep from * to end.
If you have any questions, comments or concerns please let us know. If you have a favorite edge or trim stitch please share! Thanks for reading and enjoy your day!
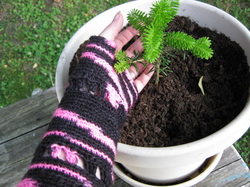
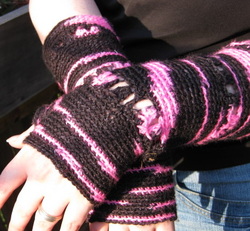 Hi! I was slack, I'm sorry, but I'm back. It seems the days are zipping by. Doesn't it seem weird that now the days are longer I seem loose track of them easier, I guess I'm taking all this beautiful day light for granted. Anyway, I got some beautiful yarn awhile back, its Shirekat Glitzy Glam Vamp, quite a mouthful and I think I missed a word or two in there somewhere even. I got lace weight and it was the first time I have played with lace weight other than the baby yarn, but I don't think that counts.
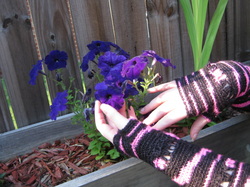 I had no plans for this yarn when I bought it I just loved the pink and black color scheme. After sitting and staring at it awhile the idea for fingerless gloves formed in my head. So... I made them. This is actually the second pair of gloves I made, the first were yellow and black stripe, so I experimented a bit and added some shells. I think I made them a little too big ;_; but I guess I can always try again, my arms are small so my guess was off. If you make fingerless gloves make sure you make the top part a little tight on your arm, thats what holds it up. All the patterns I read just go straight down but I decreased in then increased back out. It makes them look a little weird off the arm and probably would have been an unnecessary step had I made them tight enough to fit.
Let me know what you think!
I hope to make more fingerless gloves in the future so if you have any advice I'd love to hear it.
Kristina here. Hope everyone is doing great out there in cyber land.
I have a tendency to take a new technique or new idea and become totally obsessed with it for a short amount of time. A while back I was completely obsessed with making plarn (plastic bag yarn) but had not made anything with it. The local scrap exchange (very cool store) was having an event so I thought, hey I'll make a bag for it. Well 1 turned into 4. Check them out in the pictures below.
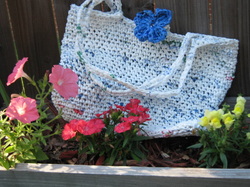 The white one was first, it was just a basic big tote bag and I decided to throw a big blue flower on it. I definitely had more white and brown than any other color.
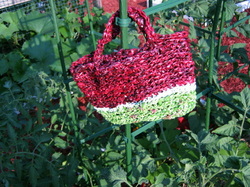 I had so much fun that I decided to try another one. I made the watermelon bag next. I only had so much of those great colors and used them all so it ended up being a cute little clutch bag.
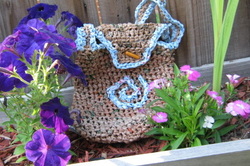 I couldn't stop myself so I made one more using up all the brown I had to make a little lunch bag and all the light blue I had trimming it out. I have never done surface crochet before but I was just staring at the empty bag and it seemed to be staring back at me. I just gave it a try and I think it turned out very well. I am very pleased with the little spiral that presented itself to me. The little wooden toggle was upcycled off of an umbrella that broke in the wind.
 I got some more brown bags and everyone said the spiral one should have had a shoulder strap so....
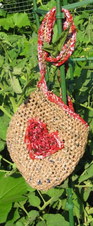
The newest addition, a shoulder hanging bag with a tapestry crochet heart on it. The heart was originally just an outline but it looked so dull so I decided to fill it in.
It was super fun making these bags, they were pretty easy and the big stitches lent themselves well to the surface crochet. I think I could make just about anything on them. Now I just need more colors. If you have any crazy colors let me know, I'd really like some pink and or purple.
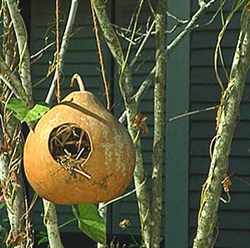
Gourd Bird house found on http://www.pallensmith.com
MATERIALS:
Gourds
Steel wool
Fine grade sandpaper
Electric drill
Circular drill bit
Regular drill bit
Twig
Hot glue gun with glue sticks
Water sealant
Twine or thin wire to hang birdhouse
DIRECTIONS:
Dry. If your gourds are already dry move on to step 2. Gourds can be air-dried in a well-ventilated area like your garage. It may take as long as a month. You can tell they are dry when you can hear the seeds rattling inside.
Clean. If crust or mold develops during the drying process, just wash the gourds in warm soapy water with a steel wool pad.
Sand. Once the gourd dries out and you have washed them up, take a fine grade sandpaper and lightly brush off any rough edges.
Create an entry. Now that you have a clean, smooth gourd to work with it's time to make an entry for the birds. Use a drill with a circular bit to carve out a hole (about 1 ½ inches) that is large enough for birds to come and go.
Drill. Next change drill bits and drill in several holes on the bottom or drainage as well as a couple of holes on the top of the gourd for hanging the birdhouse and a hole under the "front door" for the perch.
Sand again. If you find any sharp edges sand those down at this time.
Clean house. Now once all of this is done you're ready to scrape out the insides using a stick or wooden spoon.
Add the perch. Insert a twig into the hole you drilled for the perch. I used a twig from a red twig dogwood. If it doesn't fit snugly secure it with hot glue.
Seal. Spray the gourd with a water seal. This will help to preserve the birdhouse for years to come.
Hang. Pull twine or fine wire through the holes in the top of the gourd and hang the birdhouse in an area that is easy for you to see but sheltered so the birds will be safe from predators.
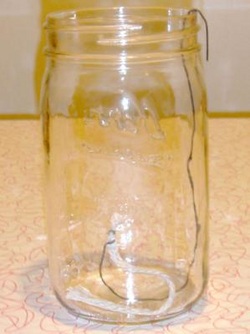
In reading the Mother Earth News I found this great article on how to make your own olive oil lamp! It’s easy to make, requires items you probably have already and can be assembled quickly in the event of an emergency power outage. Visit http://www.motherearthnews.com/Do-It-Yourself/Make-Olive-Oil-Lamp.aspx#ixzz1Lzsg6yH3 for the full article. Ingredients: - A wide-mouthed glass jar (a quart-size wide-mouthed canning jar works really well)
- A short length of flexible steel wire (1 1/2 or 2 times the height of the jar)
- A wick
- Olive oil
Putting Together the Lamp 1. Form one end of the steel wire into a long hook, about the same height as the jar. This hook holds the wire on the jar and doubles as a handle to pull the wick up for lighting. (See photos in the Image Gallery.) 2. Take the other end of the wire and wrap it into a coil, creating a wick stand about an inch or two tall that sits on the bottom of the jar. 3. Pinch the top of the metal coil onto about 2 inches in length of wick so that about a quarter inch or less of the wick is sticking up above the wire coil. Any longer and the wick will smoke. The other end of the wick will be soaking in the olive oil. 4. Add enough olive oil to your jar so that the level is just under where the wick is pinched by the wire. Any higher and you risk putting out the lamp with the oil. The olive oil is drawn up the wick where it vaporizes and gets burned by the flame. A few ounces of oil will burn for several hours, so if you are concerned about the cost, it is much cheaper than most candles. If you can find lampante oil (olive oil not suitable for eating, but for burning), you can save money by buying that instead of culinary olive oil. Want to get fancy with your olive oil lamp? You can infuse your olive oil with herbs, spices or essential oils for a more scented experience. Great idea!
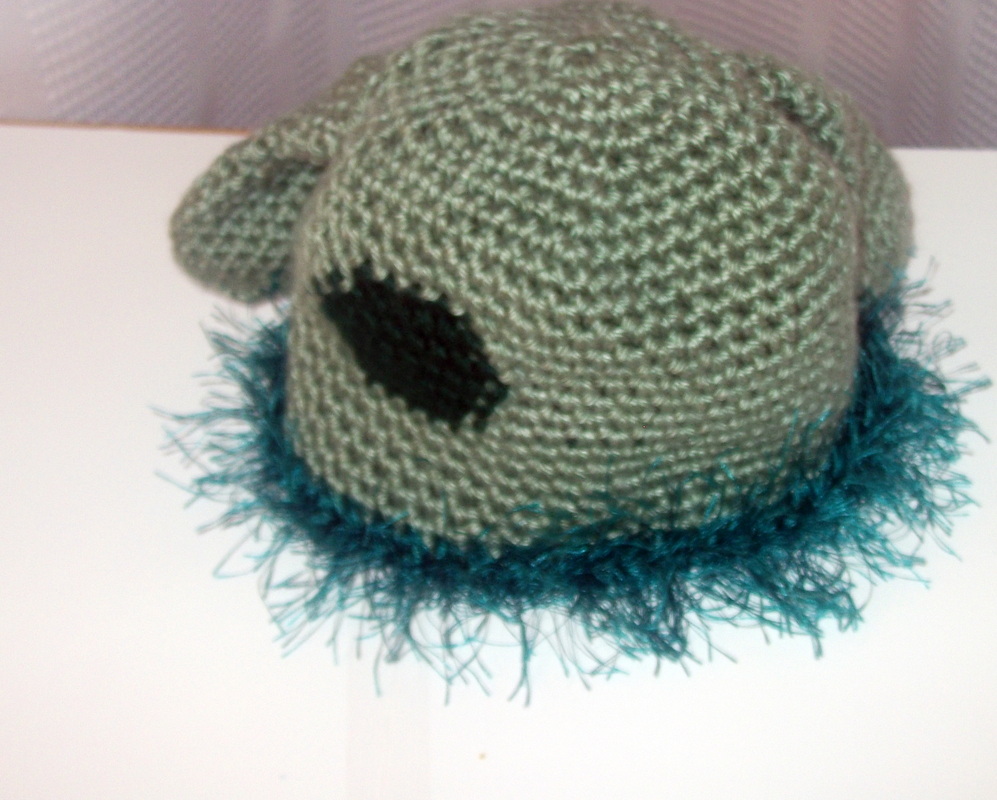
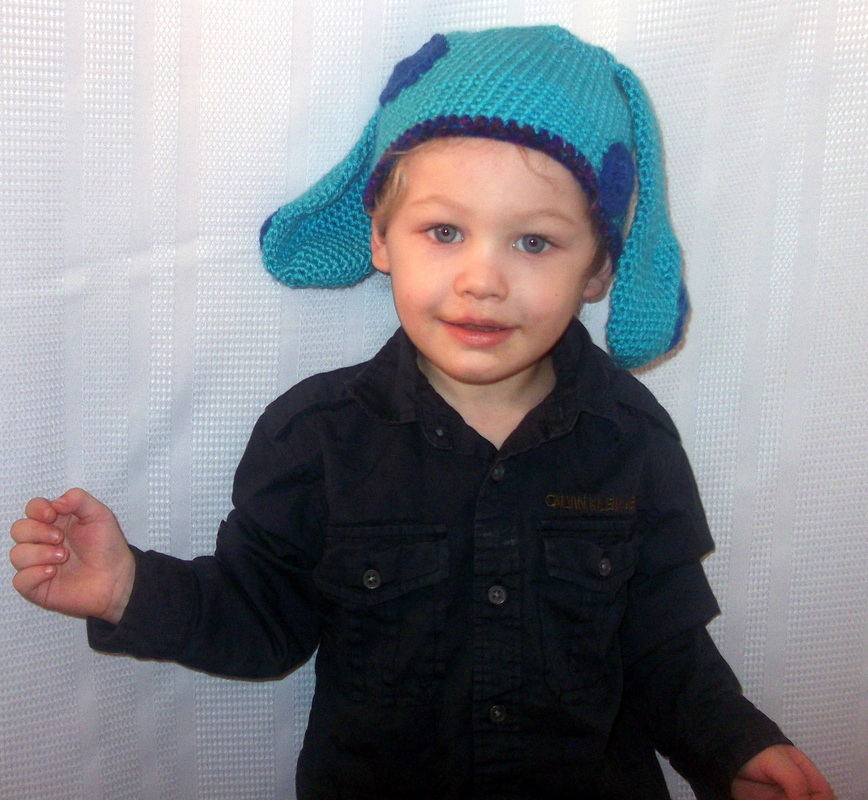
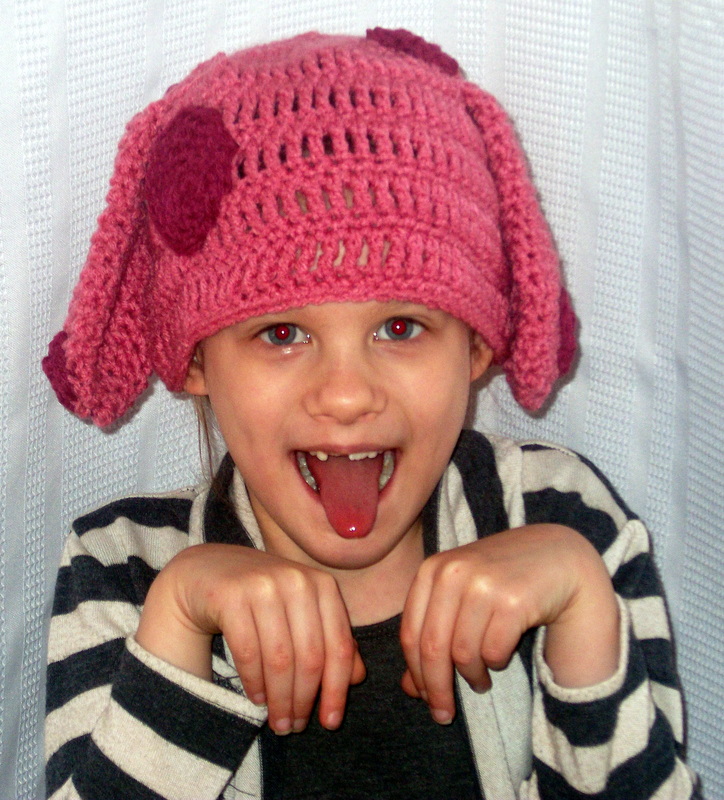
Our recent additions were the Blue's Clue's Line of hats. Its funny because as I am writing this post about the inspiration behind the line my 2 year old son is sitting mesmerized by Blue's Clues. Like any good parent I try to limit TV time and encourage imagination play; however, Blue's Clues is one of those shows I allow in our home. He has learned so much and he loves the show so much that he asks for it by name. Any time I bring the mail in he sings the song "We just got a letter" and dances around the house with his junk mail in his hands. I have even seen him stand on an open book and sing the "Blue Skadoo" song. (If you haven't watched Blue's Clues you probably have no idea what I'm talking about).
So basically my 2 year old was my inspiration. I started with a Blue hat but it was much too small and went into the Preemie donation pile (we don't sell preemie size items, we donate them to Newborns in Need). The second one I tried was a Green Puppy hat. I did that one with the spots built right into the hat. It was a bit smaller than my 2 year old though so I did another Blue hat. This time I decided I wanted to sew on the spots so they would be more circular and stand out more. Next came Magenta in a size my daughter could wear. The last hat was Periwinkle and was my size as the cute little kitty is one of my favorites. That one was a bit harder, and I wonder in hindsight if I should have sewn the triangle stripe right into the hat. But I like the raised look of the stripe I made even if it was awkward to make. Its soft and squishy and totally cute.
Hope this explains (to some extent) the method behind my madness.
 We should all do what we can to reduce our carbon footprint and reduce our impact on our world. To help out we have started experimenting with upcycling.
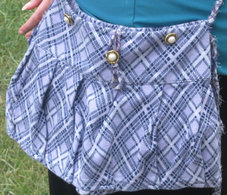
This purse is a rescued and upcycled toddler skort we saved and re-purposed it. The strap is also made from a toddler dress that was stripped down into tarn. You may recognize the buttons from our upcycled capelet. For fun, we added a couple glass lamp-work beads from when we were exploring that craft. The purse is super soft, has beautiful colors and totally will show off your personal style (or at least ours)!
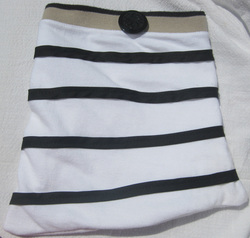 This is a belt bag we upcycled. The bag has belt loops on the back from a pair of black jeans we were using for a different project. The binding tape that makes up the stripes came from the scrap exchange so while they are technically new they are recycled. The great big button came from... well actually I'm not sure, but I'm sure we saved it because it was from our stash not from the store. The most interesting part (in my humble opinion) is the purse itself... its a sleeve. Yes you read that right, its a short sleeve from a polo shirt, two actually they are tucked inside of each other so the outside is.. well outside, on both sides. This means no ugly seams on the inside, beautiful and upcycled at the same time.
 Here is another fun and funky upcycled shorts purse. We used a pair of pink girls shorts Kristina's daughter had outgrown (they are washed and clean!). We looped a bit of recycled ribbon to make a pass thru retro style handle and there you have a unique handbag.
These purses are currently being featured in the Scrap Exchange's artist's market spot. Stop by and see them!
If you have some fun upcycling projects and want to share pictures, we would be delighted to see them! Also we are looking for more great ideas of how to reuse t-shirt sleeves and some collars from some tarned golf shirts. Please send us your ideas and suggestions!!
Thanks, Millie
It’s time for the big reveal! Drum roll please!
Tada, our new line is none other than Blue’s Clue’s hats. My son loves Blue’s Clues, he watches all the old episodes on Netflix, yay Netflix. Now I do not own Blue’s Clues or anything, of course, but I was hoping it wouldn’t be too bad to have a hat based on each character.
The first one I did was the green puppy hat, it ended up being a little smaller than I meant to (it was supposed to fit Bob but it’s more like for a 1 year old). It was cute, and I used tapestry crochet techniques to put two spots on the hat. The ears are cute and small like Green Puppy’s.
The second one was Blue and it was big enough for Bob, a 2 year old hat with room to grow. This time I decided to crochet the spots separately and sew them on. I think this gave it a more dynamic look and they were more circular too. The ears were big, floppy, and spotted, like Blue’s.
The third one as Rami’s size, she is 7, but it is also super stretchy and had a fold over so it could fit a wide range of sizes (including me). The ears were big and floppy again and I repeated the spots (but more of them) but the fun part was the stitch I used, I did TC this time, first time making a hat like that, and it gave it a springy feeling and also made it stretchy as I said.
Lastly I made a Periwinkle hat. This one was a little harder because of the triangular stripes he has on his cheeks. I decided to make it more of a stripe than just a triangle and it took some fiddling with to get it just the way I wanted it. I then had to sew them on like the spots were sewn on. This one I did mostly in HDC which was again new for me and created a closer knit look. It is super springy so I could tuck my pony tail in if I wanted but not too loose to wear normally. I did a fun trim to make it unique.
All the hats are soft and cuddly and pleasing to the eye. I was very pleased with how they turned out and hope you love them all. They will be launched over the next 4 days so if you don't see the one you want in the shop today check back tomorrow.
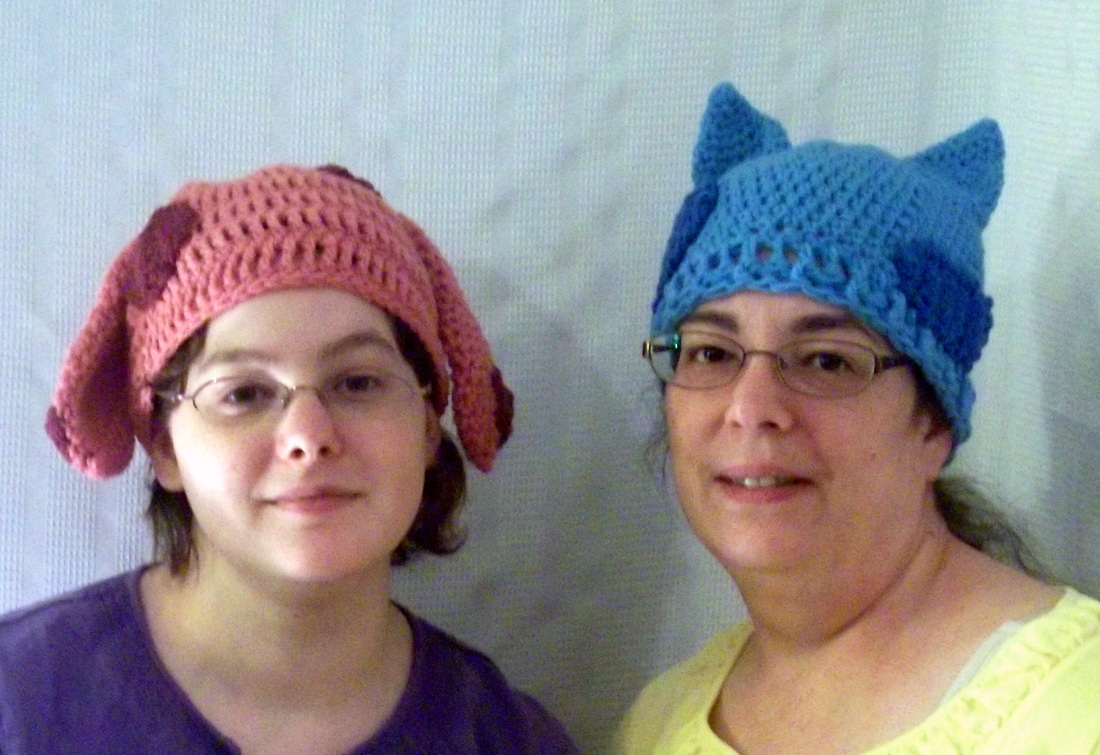
 Kristina made a litter of cat ear hats last week and I hopped in with a batch of headbands.
They come in adult and youth sizes and a multitude of colors. Both sizes have ties so you can snug it down like you want it.
(click pics to head to the store in another window)
 These cute little Princess Tiara headbands in different colors and we added a tiny jewel to each peak (what do you call those things?)
Adult size has 5 peaks, youth three.
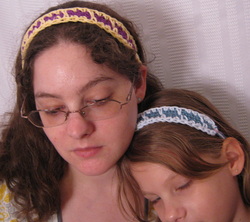 I know this stitch has many names and I usually call it the drop stitch, but while making them I could only think of VAMPIRES! So I call this style the Vampire Teeth.
You can choose coordinating or clashing colors - your choice :)
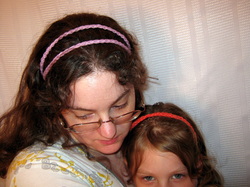 These styles are not on the website yet but check back. For the youngling a small, solid band that will fit newborn and up.
For the all grown up ones two strands for a more stylish look. Both these styles hook with a button enabling them to fit an size head.
Hope you are still having fun with crochet month and are enjoying our post blast. We sure are! Check out our shop and surf the web and then get out there and look for crochet everywhere!
Thanks for reading, Millie
|